When I think about tips on making your bathroom faucets spotlessly clean, I start with the water itself. Most of the mess is not really dirt. It is usually hard water, soap scum, or a cleaning habit that made the problem worse.
According to the USGS, water hardness is primarily caused by dissolved calcium and magnesium. When water droplets evaporate on a faucet, these minerals can remain behind as white spots or scale.
That is why two bathrooms can get very different results from the same cleaner. If your water is hard, the faucet does not stay clean by accident. It needs a routine.
Understanding Your Water for Spotlessly Clean Bathroom Faucets
How to Check for Hard Water at Home
You can perform a quick preliminary check with a clear bottle and a small amount of pure liquid soap. Fill the bottle with tap water, add a few drops of soap, and shake it. Water that produces little lather and leaves a cloudy residue may be relatively hard. Dishwashing detergent is not suitable for this test because it may lather even in hard water.
This method cannot provide an exact hardness level. For a more reliable result, use an inexpensive water-hardness test strip or check your local water supplier’s water-quality report. Visible white deposits around the faucet base or aerator can also indicate mineral buildup, although dried soap or toothpaste may look similar.
How Water Hardness Affects Faucet Maintenance
Water hardness affects how often a faucet needs attention. In areas with softer water, regular wiping and mild soap may be sufficient. Hard water requires more frequent drying and occasional mineral removal, especially around the spout outlet, handle base, and other areas where droplets collect.
That white buildup is often a mix of calcium deposits and other minerals, and once it starts, soap scum likes to tag along. It is annoying, sure, but it is predictable. The better you know your water, the less you end up scrubbing later.
For faucet maintenance, that is the real win: fewer surprises, fewer panic cleans, and less chance of scratching the finish while trying to fix a problem that should have been handled earlier. If you want the hands-on version, I walk through cleaning a faucet aerator in another guide. For finish damage that has already started, I also break down what causes bathroom faucets to corrode.

The Daily and Weekly Routine for Spotlessly Clean Bathroom Faucets
The 60-Second Daily Habit That Prevents Most Water Spots
The simplest habit is also the one most people skip. After the last use of the day, wipe the faucet and the area around its base with a clean, soft microfiber cloth. Do not allow water droplets to remain on the finish, especially if your home has hard water.
This takes less than a minute and stops the tiny mineral rings that slowly turn into ugly spots. If you live with hard water, that tiny habit matters more than any fancy cleaner. Honestly, it is boring, and that is exactly why it works.
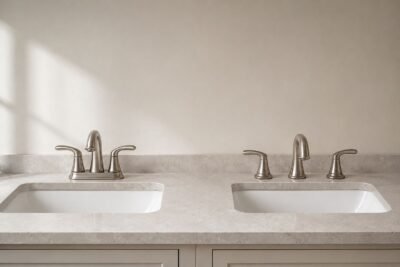
Faucets around frequently used double vanities often develop spots quickly because water collects around the base throughout the day. Drying the fixture after the final use can noticeably reduce new mineral marks, even when the water supply is hard.
Weekly Deep Clean: Products, Tools, and Technique
For routine weekly cleaning, mix a small amount of mild, pH-neutral dish soap with warm water. Wipe the handle, faucet body, spout, and base with a clean microfiber cloth. Use a damp cotton swab or a very soft brush around seams only when necessary, applying minimal pressure. Rinse away any soap residue and dry the faucet completely. The aerator does not need to be removed unless the water stream becomes weak, uneven, or unusually splashy.
I keep the daily wipe and the weekly clean separate on purpose. The daily wipe handles fresh water spots. The weekly clean handles soap scum, fingerprints, and the light film that starts to dull the finish. Different mess, different job.
If I need more help, I use a diluted vinegar solution on mineral spots, but I do not soak every finish the same way. Short contact time is safer than a long soak. I have seen plenty of faucet damage that started with good intentions and the wrong pad.
How Water Hardness Should Change Your Cleaning Schedule
The harder the water, the shorter the cleaning cycle. With very hard water, I would not wait until the faucet looks dirty. By then, you are already behind.
I break it into three levels: daily wipe, weekly wash, and a deeper descale when the shine starts to fade. That sounds almost too simple, but honestly, simple is what people stick with. A routine you actually do beats a perfect routine you never touch.
Bathroom Faucet Cleaning Schedule by Water Hardness
| Water condition | Common signs | Daily care | Descaling frequency |
|---|---|---|---|
| Soft water | Few visible spots; soap lathers easily | Wipe away visible splashes | Only when mineral buildup appears |
| Moderately hard water | Light white spots around the base and spout | Wipe the faucet dry at the end of the day | Every 2–4 weeks, if needed |
| Hard water | Frequent white marks and crust around the aerator | Dry after heavy use or at the end of the day | Every 1–2 weeks using a finish-safe method |
| Very hard water | Rapid spotting and recurring mineral scale | Wipe dry after each use when practical | Treat deposits as soon as they appear |
Natural Cleaning Solutions That Keep Bathroom Faucets Spotlessly Clean
White Vinegar and the Science of Acid-Based Cleaning
White vinegar works because it helps dissolve mineral deposits. If you have hard-water spots, that matters more than smell or brand hype. A mild acid is usually enough for fresh scale, and it is one of the easiest fixes to reach for first.
I use vinegar on faucets when the buildup is light to moderate. Wet a cloth, wrap the affected area, wait a few minutes, then wipe and rinse. That is usually enough for fresh scale. If you move slowly and keep the contact time short, the finish stays happier too.
A Safer Method for Stubborn Residue
For residue that does not come off with mild soap, place a warm, damp microfiber cloth over the affected area for several minutes to soften the buildup. Wipe gently, rinse, and repeat if necessary.
Avoid baking soda pastes, scouring powders, and abrasive pads unless the faucet manufacturer specifically approves them. Even mild abrasives can scratch polished finishes or create uneven shiny patches on matte surfaces.
When DIY Solutions Fall Short — Switching to Commercial Products
If mineral deposits remain after gentle cleaning, use only a nonabrasive product that is specifically approved for the faucet’s finish. Check both the cleaner label and the faucet manufacturer’s care instructions. A product that is safe for tile, glass, or a ceramic sink may still damage a plated or painted faucet.
How to Remove Hard Water Stains Without Damaging the Finish

Treating Mineral Deposits Safely
First confirm that the faucet manufacturer permits the use of diluted vinegar or another mild acidic cleaner on the finish. Apply the approved solution to a cloth and hold it against the deposit for only the recommended contact time. Do not tightly wrap or soak painted, lacquered, matte, oil-rubbed, or unidentified finishes.
Rinse the area thoroughly and dry it after each treatment. Repeat a gentle treatment when necessary rather than scraping the deposit with a blade, abrasive pad, or hard brush.
Deep-Cleaning the Aerator to Fix Weak Water Flow

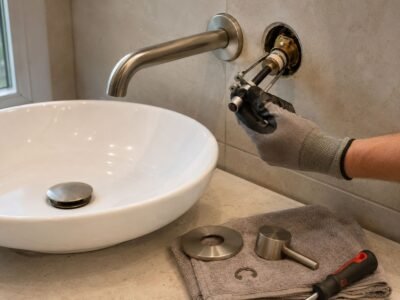
If the stream becomes weak, uneven, or unusually splashy, mineral deposits may be blocking the aerator. Close the faucet, cover the sink drain, and remove the aerator according to the manufacturer’s instructions. Some recessed aerators require a matching aerator key.
Note the order of the screen, flow regulator, and washer before separating the parts. Rinse away loose debris and clean only the removable components with a manufacturer-approved solution. Avoid soaking decorative or coated outer rings unless the care instructions permit it. Reassemble the aerator, run the water, and check for leaks.
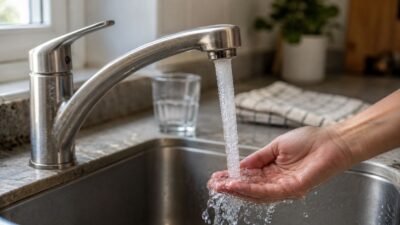
A clean aerator helps maintain an even stream and prevents unnecessary splashing. Water-efficient bathroom faucet aerators can also reduce flow while maintaining usable performance.
Polishing and Protecting Your Faucet Finish
Once the deposits are gone, rinse the faucet and dry it completely. Gently buff the surface with a clean, dry microfiber cloth to remove streaks and restore an even appearance. Do not apply metal polish, wax, or protective coating unless the faucet manufacturer specifically recommends it.
The finish also affects how visible water spots and fingerprints appear. Polished surfaces may show dried droplets clearly, while brushed or textured finishes can make minor marks less noticeable. However, cleaning requirements depend on the coating and manufacturer, not only on the color.
When choosing a replacement fixture, explore the A-TORNEIRA bathroom sink faucet collection or single-hole faucet collection and review the care instructions for each available finish.
Cleaning Mistakes That Keep Bathroom Faucets from Staying Spotlessly Clean
Abrasive Tools and Harsh Cleaners That Scratch Finishes
The biggest mistake is over-scrubbing. Steel wool, rough sponges, and gritty powders can leave micro-scratches that make the faucet hold onto dirt faster next time.
If a cleaner says it is safe for “everything,” I still test it carefully. Finishes age differently, and matte black shows abuse faster than people expect. Yeah, the answer is boring, but the scratch marks are real.
Products You Should Never Mix on a Faucet
Never mix household cleaning products. In particular, bleach must not be combined with ammonia, vinegar, acidic descalers, or other cleaners because the mixture may release dangerous gases. Use one product at a time, provide adequate ventilation, and rinse the faucet and surrounding sink thoroughly before using a different product.
A simple, single-product cleaning routine is both safer and easier on the faucet finish.
Finish-Specific Cleaning Precautions

Cleaning Methods for Common Bathroom Faucet Finishes
| Faucet finish | Recommended routine | Avoid |
|---|---|---|
| Chrome | Clean with mild dish soap, warm water, and a microfiber cloth | Steel wool, scouring pads, and abrasive powders |
| Brushed nickel | Use mild soap and wipe gently in the direction of the visible grain | Aggressive scrubbing, abrasive cleaners, and polishing compounds |
| Matte black | Clean with water, mild soap, and a soft cloth; dry immediately | Vinegar, bleach, solvents, wax, and abrasive pads unless specifically approved |
| Oil-rubbed bronze | Use mild soap, rinse thoroughly, and dry immediately | Metal polish, acidic cleaners, and abrasive materials |
| Brass or living finish | Follow the manufacturer’s recommended care method | Harsh cleaners and products intended to remove the natural patina |
Chrome: Use mild soap, water, and a soft cloth for routine cleaning. Avoid abrasive pads and do not assume acidic cleaners are safe without checking the manufacturer’s instructions.
Brushed nickel: Wipe gently in the direction of the brushed texture when it is visible. Abrasive cleaning can create scratches or uneven shiny areas.
Matte black and other coated finishes: Begin with water and mild soap. Avoid acids, solvents, waxes, polishing compounds, and abrasive materials unless specifically approved by the manufacturer.
Oil-rubbed bronze, brass, and living finishes: These surfaces may naturally change over time. Do not attempt to remove patina as though it were ordinary dirt without first reviewing the product’s care guidance.
A spotless bathroom faucet does not require aggressive scrubbing. Use mild soap for routine cleaning, dry the fixture regularly, treat mineral deposits before they harden, and follow the manufacturer’s instructions for the specific finish. These simple habits help preserve the faucet’s appearance while reducing the risk of scratches, coating damage, and recurring water spots.