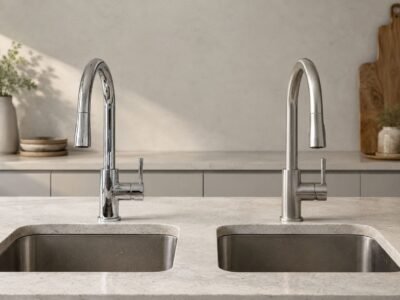
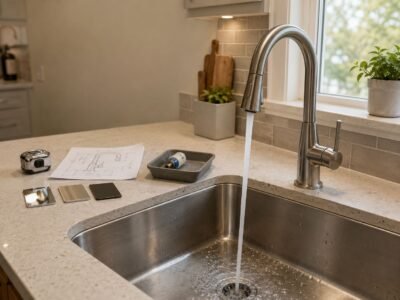
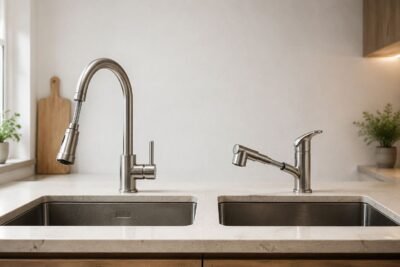
Before choosing a faucet by style or finish, confirm that it can physically mount to the sink and work comfortably in the available space. Check the number, diameter, and spacing of the mounting holes, the sink or countertop thickness, the faucet’s spout height and reach, handle clearance, and the space below the sink for hoses and mounting hardware. A mismatch can prevent installation or cause restricted movement, poor stream placement, and excessive splashing.
Many sink-and-faucet combinations appear suitable on a product page but reveal problems during installation or everyday use.
Quick Sink and Faucet Compatibility Checklist
| What to Check | Compatible When | Warning Sign |
|---|---|---|
| Mounting holes | The number and layout match the faucet configuration | The faucet requires a different number or arrangement of holes |
| Hole spacing | Center-to-center spacing falls within the faucet’s specified range | A centerset faucet is being used on widespread holes, or vice versa |
| Mounting-hole diameter | The faucet shank fits within the manufacturer’s permitted hole size | The hole is too small, excessively large, or prevents proper sealing |
| Deck thickness | The faucet shank is long enough for the sink and countertop thickness | The mounting nut cannot fully engage the shank |
| Spout height | There is enough working clearance without excessive water drop | A tall outlet over a shallow bowl causes splashing |
| Spout reach | The stream falls within the central usable area of the bowl | Water strikes the rear wall, front rim, or steep side of the sink |
| Handle clearance | The handle completes its full hot-to-cold and on-to-off movement | The handle hits a backsplash, wall, window sill, or sink rim |
| Under-sink clearance | Hoses and counterweights move without obstruction | The pull-down hose catches on drains, supply lines, shelves, or a disposal |
| Mounting style | The plumbing matches a deck-mounted or wall-mounted faucet | The faucet requires a different rough-in or installation method |
| Bathroom drain | The drain matches the sink’s overflow configuration | An overflow drain is paired with a non-overflow sink, or vice versa |
1 — Check Sink and Faucet Compatibility: Hole Configuration and Spread
Count the Number of Mounting Holes
Start by counting the faucet holes in the sink or countertop and measuring their center-to-center spacing. A one-hole deck normally accepts a single-hole faucet. A three-hole deck may be designed for a 4-inch centerset or mini-widespread faucet, or for a widespread faucet with holes spaced approximately 8 to 16 inches apart. A fourth hole is often used for a side sprayer, soap dispenser, filtered-water faucet, or air gap. Wall-mounted faucets do not use these deck holes and require correctly positioned plumbing inside the wall.
Common Sink Hole Configurations and Faucet Options
| Sink or Countertop Configuration | Common Faucet Options | Important Note |
|---|---|---|
| One hole | Single-hole faucet | Check the hole diameter and maximum deck thickness |
| Three holes with 4-inch centers | Centerset or compatible mini-widespread faucet | Measure from the center of one outer hole to the center of the other |
| Three holes with wider spacing | Widespread faucet | Confirm the faucet’s adjustable installation range |
| Three holes converted to one | Single-hole faucet with a compatible deck plate | The plate must fully cover the unused holes |
| Four holes | Three-hole faucet plus side sprayer, soap dispenser, or accessory | Identify the purpose and position of the fourth hole |
| No deck holes | Wall-mounted faucet or an undrilled custom installation | Wall plumbing, mounting height, and spout projection must be planned separately |

I have walked into plenty of jobs where the homeowner bought a faucet because it looked right in the box, then discovered the sink hole pattern made it a bad fit. On a compact vanity, that usually means the body covers too much or too little of the deck. On a larger sink, it means the handles land in the wrong place and the whole setup looks patched together.
Measure the Spread Between Outer Holes
Do not measure edge to edge. Measure center to center. That is the number that tells you whether a centerset or widespread faucet belongs there. A 4-inch centerset sink is not the same thing as an 8-inch widespread sink, and if you mix those up, the faucet will either refuse to mount or look forced from the start. Understanding the basic faucet structure and how mounting components work makes this measurement step much clearer.
I always tell people to check the spread before they fall in love with the faucet finish. The spread matters more than the trim. If the outer holes are not where the faucet expects them to be, the handles will feel cramped or too far apart, and the faucet may not even seat flush on the deck.
Check the Mounting-Hole Diameter and Deck Thickness
Matching the number and spacing of the holes is not enough. Compare the diameter of each mounting hole and the total thickness of the sink and countertop with the faucet’s specification sheet. If the mounting shank is too short, the faucet cannot be clamped securely from below. A hole that is too small will not accept the faucet body, while an oversized hole may prevent the gasket and mounting hardware from centering or sealing correctly. Also check whether adding an escutcheon reduces the faucet’s maximum permitted deck thickness.

When a Deck Plate Can Hide the Mismatch — and When It Can’t
A deck plate, also called an escutcheon, can cover unused holes when a single-hole faucet is approved for installation on a three-hole sink. However, it cannot change the required spacing of a multi-piece faucet, enlarge an undersized mounting hole, correct an oversized hole outside the manufacturer’s limits, or compensate for a sink or countertop that is too thick. Before using one, confirm that the plate is compatible with the faucet and wide enough to cover every unused opening.
A common kitchen upgrade is replacing a three-hole faucet with a single-hole pull-down model. This can work well when the faucet is approved for use with an escutcheon, the plate completely covers the unused holes, and the mounting shank accommodates the combined thickness of the sink and countertop. The plate should sit flat, completely cover the unused holes, and allow the faucet base to remain securely mounted.
Before choosing an A-TORNEIRA single-hole kitchen faucet, compare its required mounting-hole size, maximum deck thickness, and escutcheon dimensions with the sink specifications.
2 — Match Faucet Height, Spout Reach, and Stream Alignment to Your Sink
Shallow Sink with a Tall Faucet: The Splashing Problem
A tall faucet is not automatically incompatible with a shallow sink, but the combination requires careful attention to the outlet height, stream angle, and landing point. Splashing becomes more likely when water falls a long distance and strikes a steep sidewall, raised drain stopper, or other hard surface. Compare the faucet’s outlet height and spout reach with the sink’s internal depth and bowl shape rather than judging faucet height alone.
Use the dimensions listed in our kitchen sink faucet collection to compare outlet height and spout reach before selecting a model.
Flow rate is a separate consideration from physical compatibility. WaterSense-labeled bathroom sink faucets use no more than 1.5 gallons per minute, but a lower flow rating does not automatically prevent splashing. Stream shape, aeration, water pressure, outlet height, and the point where the water strikes the bowl are equally important. Treat WaterSense certification as a water-efficiency feature rather than proof that a faucet will match a particular sink.
Deep Sink with a Short Faucet: Clearance and Reach Issues
A deep sink needs enough vertical clearance for comfortable handwashing, cleaning, or filling containers. However, faucet height and spout reach should be evaluated separately. A low spout can restrict working space, while inadequate reach can cause the stream to strike the rear wall of the bowl. Compare both measurements with the sink’s inner dimensions and drain location before choosing the faucet.
Getting the Water Stream-to-Drain Alignment Right
Use the faucet’s dimension drawing to estimate where the stream will enter the bowl. Ideally, it should fall within the central usable area of the sink rather than against the rear wall, front rim, or a steeply sloped side. Landing near the drain is often practical, but the stream should not strike directly against a raised drain stopper if doing so creates splash.

This problem is often discovered only after the water is turned on. If the stream strikes a curved or steep section of the bowl and scatters outward, changing the aerator may help, but a faucet with a more suitable reach or outlet angle is usually the more reliable solution.
3 — Check Handle Clearance and Everyday Usability

Handle Swing Clearance: Don’t Let the Backsplash or Wall Block Hot Water
A faucet may fit the mounting hole but still be unsuitable for the available space if its handle cannot complete its intended range of motion. This commonly occurs when a rear-mounted or side-mounted handle is too close to a backsplash, wall, window sill, or raised sink rim. During a dry fit, move the handle through its full on-to-off and hot-to-cold range, and compare the required clearance with the manufacturer’s dimension drawing.
Pull-Down Sprayers That Hit the Sink Wall or Won’t Dock Properly
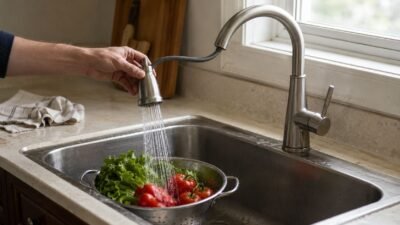
Pull-down faucet compatibility depends on clear space both above and below the sink. Above the deck, confirm that the spout can swivel without hitting a wall or window and that the spray head drops into the bowl without rubbing against the rear wall. Below the deck, the retractable hose and counterweight must travel freely without snagging on supply lines, the drain assembly, a garbage disposal, shelves, or stored items. Restricted hose movement can prevent smooth retraction and reliable docking.
When comparing pull-down kitchen faucets, check the spout reach, swivel range, hose length, docking system, and required under-sink clearance rather than relying only on the faucet’s overall height.
Wall-Mount vs Deck-Mount: Mounting Style Mismatches
Wall-mounted and deck-mounted faucets require different plumbing and mounting conditions. A deck-mounted faucet attaches through holes in the sink or countertop, while a wall-mounted faucet requires a compatible valve or rough-in body inside the wall. For a wall-mounted installation, confirm the finished-wall thickness, faucet height, spout projection, and stream landing point. Existing sink holes do not determine wall-mount compatibility by themselves.
Converting between wall-mounted and deck-mounted installations is possible in some cases, but it usually requires plumbing changes rather than a simple faucet replacement.
4 — Visual Fit: Proportion and Finish Considerations
These issues do not normally prevent installation, but they can make an otherwise functional sink-and-faucet combination look unbalanced.
Faucet Proportions: Too Big, Too Small, or Visibly Out of Place
Sometimes the mismatch is obvious the second you set the faucet in place. A tall faucet can dwarf a small basin. A short faucet can disappear on a larger sink. Either way, the sink looks off before you even turn the water on.
I use proportion as a final sanity check. If the faucet body feels like it is overpowering the sink, the setup will probably feel wrong in daily use too. If it looks undersized, the sink may work, but it will never look balanced.
Finish and Material Clash Under Real Kitchen and Bathroom Lighting
Finish compatibility is primarily a design consideration rather than an installation requirement. Compare the faucet with the sink, drain, cabinet hardware, and nearby appliances under the room’s normal daylight and artificial lighting. Matching every metal finish is not necessary, but the combination should appear intentional and visually balanced.
How to Tell at a Glance Whether the Pairing Looks Off
I use a fast visual test before I call anything compatible. I look at the hole layout, the faucet height, the handle clearance, and the overall balance of the sink deck. Then I ask one question: would I still choose this setup if I had not already bought the faucet?
Dry-fit the faucet whenever possible and compare all measurements with the sink and faucet specification sheets before modifying either product. Do not drill, enlarge, or knock out a sink hole unless the sink manufacturer specifically permits it and provides instructions for that material. Some sinks include designated knockouts, while others require specialized fabrication or should not be modified at all.
Once compatibility has been confirmed, follow our step-by-step kitchen faucet installation guide for the mounting and connection process.
A faucet is compatible only when the mounting pattern, hole diameter, deck thickness, spout dimensions, handle movement, drain configuration, and installation clearances all work together. Before ordering, compare the sink measurements with the faucet’s specification drawing and perform a dry fit whenever possible. These checks are far easier than modifying the sink or returning an unsuitable faucet after installation begins.
A-TORNEIRA provides detailed product dimensions to help you compare each faucet with your existing sink before making a purchase.