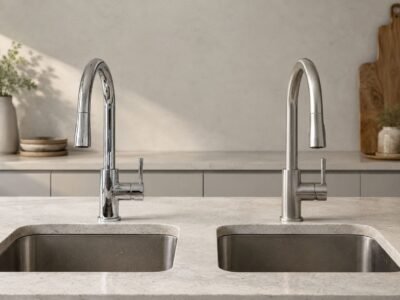
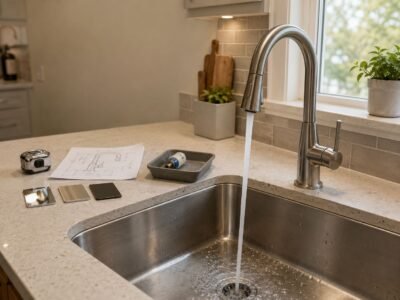
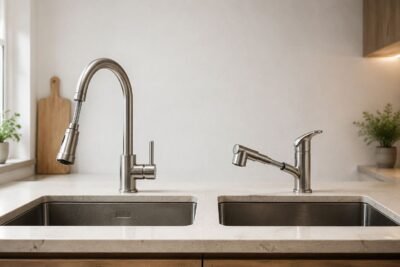
Can you add a sprayer to an existing kitchen faucet? Sometimes. The answer depends on whether the faucet has a compatible side-spray connection, whether the spout has a removable aerator, and whether the sink or countertop has an unused mounting hole. If none of these conditions apply, replacing the faucet with a pull-down or pull-out model is usually the cleaner and more reliable option.
Before buying any parts, identify your faucet model and inspect both the spout and the area under the sink. A spare deck hole only provides a mounting location; it does not create a water connection. Likewise, an aerator-mounted attachment works only when the aerator is removable and the threads are compatible. Checking these details first can prevent leaks, cross-threading, and unnecessary returns.
Check Compatibility Before Adding a Kitchen Faucet Sprayer
Start with four checks: the number of unused mounting holes, the faucet model, the available sprayer connection, and whether the aerator is removable. You should also inspect the cabinet for a clear hose path around the drain, garbage disposal, shutoff valves, and stored items.
Count Your Sink Holes and Check the Spacing
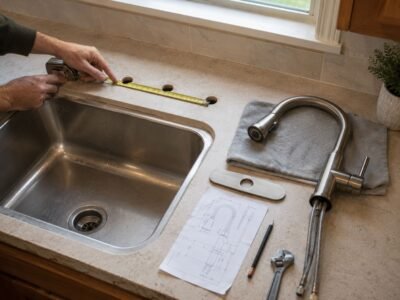
Count the unused holes, not just the total number of holes. A three-hole or four-hole sink may already use every opening for the spout, handles, soap dispenser, or air gap. If an unused hole is available, measure its diameter and confirm that the sprayer guide will fit. Also check whether a deck plate is covering additional holes, but do not assume those holes can be exposed without loosening or repositioning the faucet.
I measure center to center, not by eye. Older countertops are rarely as standard as they look, and sink hole spacing can be the difference between a clean install and a return trip.
A deck plate may conceal one or more unused holes, but exposing them often requires loosening or removing the faucet. On stone countertops, avoid drilling a new hole unless the work is completed by someone with the correct tools and experience. Renters should use a reversible aerator-mounted option instead of modifying the sink or countertop.
Identify the Faucet Model and Look for a Side-Spray Outlet
Not every kitchen faucet can accept a side sprayer. The faucet must have a compatible side-spray outlet and diverter, and the hose connector normally needs to match the specific faucet model. A spare sink hole alone is not enough. Before ordering parts, look for the model number on the faucet, supply line, or product documentation and confirm compatibility with the manufacturer.
Also inspect the faucet body, mounting hardware, and supply connections. If the faucet is loose, corroded, or already leaking, adding another hose and connection point is rarely worthwhile. In that case, replacing it with an integrated pull-down faucet is usually the more reliable long-term solution.
Check Existing Flow and Under-Sink Clearance
Low flow is not always caused by low household water pressure. Before adding a sprayer, clean the existing aerator, make sure both shutoff valves are fully open, and inspect the supply lines for kinks. A new spray head will not correct an upstream restriction. You should also confirm that the sprayer hose can move freely without catching on the drain, garbage disposal, shutoff valves, or cabinet contents.
And when I do decide a replacement makes sense, I lean toward a setup that keeps the hose routing simple and the cabinet from turning into spaghetti. When a full replacement makes more sense, compare the faucet’s mounting configuration, hose reach, docking system, flow rate, and cabinet-clearance requirements. A-TORNEIRA pull-down kitchen faucets provide an integrated spray function without requiring a separate side-sprayer mounting hole.
4 Ways to Add a Sprayer to Your Kitchen Faucet
The options below include three retrofit methods and one full faucet replacement. Prices are approximate parts-only costs and do not include professional labor, new shutoff valves, or countertop modifications.
I sort the options in a practical way: side sprayer, aerator swap, full faucet replacement, or a diverter-style retrofit. Each one has a different price, wrench time, and payoff. The right answer is the one that matches your sink, not the one with the fanciest box. If you decide a full replacement is the better route, my [step-by-step kitchen faucet install guide] covers every phase.
The table below compares the four main options by compatibility, cost, installation difficulty, and whether they require a permanent change.
| Option | Best For | Key Requirement | Approx. Cost | Installation Difficulty | Permanent Change |
|---|---|---|---|---|---|
| Side sprayer | Sinks with an unused mounting hole | Compatible side-spray outlet and diverter | $30–$80 | Moderate | Minor |
| Swivel spray aerator | Renters and quick rinse upgrades | Removable, compatible aerator threads | $5–$25 | Easy | No |
| Diverter with handheld hose | Renters who need extra hose reach | Compatible faucet-end threads | $20–$100 | Easy–Moderate | No |
| Pull-down or pull-out faucet | Worn faucets and long-term upgrades | Compatible sink-hole configuration | $80–$400+ | Moderate | Yes |
Option 1: Install a Model-Compatible Side Sprayer in an Unused Hole — $30–$80
This option works only when two conditions are met: the sink or countertop has an unused mounting hole, and the existing faucet has a manufacturer-approved side-spray outlet and diverter. The unused hole supports the spray-head guide, while the water connection is made beneath the faucet. You will also need a hose and connector that match the faucet model.
Before tightening the mounting hardware, route the hose away from the drain trap, garbage disposal, electrical cords, and shutoff valves. Pull the sprayer out several times to confirm that the hose moves freely and returns without snagging.
Option 2: Install a Swivel Spray Aerator — $5–$25
A swivel spray aerator is the simplest reversible upgrade when the faucet has a removable, threaded aerator. It can provide a wider spray pattern and improve rinsing coverage, but it does not offer the reach of a handheld hose. This option may not fit pull-down spray heads, recessed cache aerators, or faucets with proprietary thread sizes.
The U.S. Department of Energy’s aerator installation guidance recommends gently removing the old aerator, cleaning the faucet threads, verifying the correct size and type, and installing the replacement without cross-threading or overtightening. After installation, run the water and inspect the connection for leaks.
Option 3: Install an Aerator-Mounted Diverter and Handheld Hose — $20–$100
An aerator-mounted diverter kit connects to the end of a faucet after the original aerator is removed. The diverter allows water to flow either through the regular faucet outlet or through a separate handheld hose. This can be a practical no-drill option for renters or sinks without an unused mounting hole.
Compatibility is the main limitation. The faucet must have a removable aerator and matching threads, and many pull-down spray heads or recessed aerators cannot accept this type of adapter. Use a kit designed for sink-faucet use, make sure all washers are correctly seated, and turn the faucet off after every use rather than relying on the handheld sprayer’s trigger as the only shutoff.
Option 4: Upgrade to a Pull-Down or Pull-Out Faucet — $80–$400+
A full replacement is usually the best long-term choice when the existing faucet has no side-spray connection, the aerator cannot accept an attachment, or the faucet is already worn or leaking. An integrated sprayer still uses a hose and, in many models, a counterweight under the sink, but it eliminates the separate side-sprayer guide and creates a cleaner deck layout.
How to Install a Kitchen Sprayer Safely Without Leaks or Damage
The biggest install mistakes I see are boring ones, which is good news, because boring problems are easy to avoid. Common causes of leaks include a misplaced washer, a cross-threaded adapter, an incompatible connector, overtightened plastic parts, and a hose that has not fully engaged with its quick-connect fitting. If you slow down at the start, the whole job gets easier. For a broader walkthrough on what to look for, my guide on [how to choose the best kitchen faucet for your sink] covers selection in detail.
Forgetting to Turn Off the Water Supply First
Close the hot and cold shutoff valves beneath the sink before disconnecting any faucet or sprayer hose. Open the faucet to relieve pressure, and place a bucket and towel below the connections. The home’s main water supply normally needs to be shut off only when the local valves are missing, leaking, or unable to close fully. Do not force a stuck or badly corroded valve; contact a plumber if necessary.
I close the shutoff valves, open the faucet, and keep a towel and bucket ready before I touch the sprayer parts. If the valves are sticky or old, I fix them first.
Overtightening the Connections
Most people think tighter is safer. It usually is not. Plastic nuts and thin washers can deform fast, and once they do, a drip becomes a leak. Seat each washer and connector squarely, then tighten it according to the manufacturer’s instructions. Many gasket-sealed and plastic connections need only hand tightening or a small additional turn. If the fitting becomes difficult to turn immediately, back it off and check for cross-threading instead of applying more force. If a fitting needs brute force, something is off.
I learned that the hard way on a 2001 rental kitchen where the homeowner leaned on the wrench until the nut cracked. We replaced the part, backed off the torque, and the leak disappeared. That kind of problem is annoying, but it is also preventable.

Using the Wrong Thread Adapter or Size
Thread size sounds dull until the wrong part is in your hand and the faucet still will not mate up. Remove the existing aerator and take it with you when purchasing an attachment, or identify the faucet model and confirm the required thread size in the product documentation. Check whether the faucet uses male, female, metric, standard, or recessed cache threads. Never force an adapter that starts crooked, stops after one turn, or leaves the washer unevenly compressed. If the sprayer head wobbles, sits crooked, or bottoms out too early, I stop and swap it rather than trying to make it work.
A quick thread check can save a second trip, and it also keeps the faucet body from getting chewed up by mismatched metal or cheap plastic. Not glamorous, but it saves a lot of drama. If the cabinet is cramped, the shutoff valve is stubborn, or the adapter stack starts looking messy, I stop pretending this is a tiny DIY and decide whether it is time to call a plumber.
Best No-Drill Sprayer Options for Renters
| No-Drill Option | Spray Reach | Easy to Remove | Best Use |
|---|---|---|---|
| Swivel spray aerator | Low | Yes | Rinsing dishes and cleaning the basin |
| Diverter with handheld hose | High | Yes | Large cookware and extended sink cleaning |
| Suction-mounted holder | Does not supply water | Yes | Holding a compatible handheld sprayer |
The two most practical no-drill options are a swivel spray aerator and an aerator-mounted diverter kit with a handheld hose. Both require a removable aerator and compatible threads, and both can normally be removed when you move out.
Choose a swivel spray aerator when you only need better rinsing coverage around the basin. Choose a diverter-and-hose kit when you need additional reach for large cookware, sink cleaning, or other temporary tasks. A suction or adhesive holder can support the handheld spray head, but it does not provide the water connection.
Keep the original aerator, washer, and any adapters so the faucet can be restored later. Ask the landlord before drilling, replacing the faucet, or modifying the supply lines.