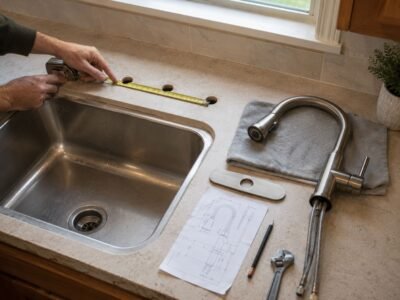
Understanding Why Your Sprayer Hose Is Failing
If you need to replace a kitchen faucet sprayer hose, start by figuring out what the hose is actually doing wrong. A quick diagnosis saves time and keeps you from buying the wrong part. I’ve seen plenty of kitchens where the real problem was a loose fitting or a sticky diverter.
According to the EPA, household leaks can waste nearly 1 trillion gallons of water annually nationwide, while the average household’s leaks can waste more than 9,300 gallons per year. Before replacing the sprayer hose, dry the cabinet and trace the water to the hose body or one of its end connections. Water coming from the faucet base, supply lines, shutoff valves, or drain assembly requires a different repair. If the leak is coming from the spout itself, I usually send people to dripping faucet repairs first.
Signs Your Sprayer Hose Needs Replacement
The first clue is usually water where it doesn’t belong. The clearest sign is water coming directly from the sprayer hose, its crimped ends, or one of its connectors while the faucet is running. Dry the cabinet and all nearby plumbing first, then operate the faucet and watch where the first drop appears. Moisture on a supply line, shutoff valve, drainpipe, or the underside of the faucet base usually indicates a different problem.
Weak spray pressure does not automatically mean the hose needs replacement. First remove and clean the spray head or aerator, check the hose for kinks, and make sure the shutoff valves are fully open. If flow remains weak with the spray head removed, inspect the hose, connector, and upstream water path for an obstruction.
Visible damage is easy to spot. Cracks, kinks, fraying, and bulges mean the hose is living on borrowed time.
Where Sprayer Hoses Commonly Fail
Sprayer hoses commonly fail near the spray-head connection, the under-sink connector, the crimped ends, or areas that repeatedly rub against the faucet body or cabinet contents. Look for cracks, swelling, abrasion, exposed reinforcement, damaged O-rings, corrosion, and water appearing around the connector while the faucet is running.
Kitchen Faucet Sprayer Problems and Likely Causes
| Problem | Likely Cause | What to Check First |
|---|---|---|
| Water leaking from the hose body | Cracked, split, or worn hose | Dry the hose and run the faucet to locate the first drop |
| Water leaking near the spray head | Loose connection, damaged washer, or worn O-ring | Check the spray-head connection and replace the seal if needed |
| Water leaking under the sink | Loose connector, damaged O-ring, or supply-line leak | Identify whether the water comes from the sprayer hose, supply line, or faucet base |
| Weak spray pressure | Clogged spray head, kinked hose, debris, or restricted water flow | Remove and clean the spray head, then inspect the hose for bends |
| Hose does not retract smoothly | Incorrect counterweight position, twisted hose, or cabinet obstruction | Check the hose route and move objects away from the hose |
| Water continues flowing from the main spout when using a side sprayer | Worn or blocked diverter valve | Inspect the diverter on faucets with a separate side sprayer |
Is It the Hose or the Diverter Valve?
First identify the faucet type. A separate deck-mounted side sprayer usually relies on a diverter inside the faucet body, while a pull-down or pull-out faucet normally sends water through a retractable hose connected beneath the faucet.
For a pull-down or pull-out faucet, remove the spray head and briefly direct the open hose into the sink. Normal flow usually points to a clogged or damaged spray head. Weak flow can result from a kinked hose, debris in the connector, a restricted hose, or another upstream problem.
For a separate side sprayer, strong water flow continuing from the main spout while the sprayer trigger is fully pressed may indicate a diverter problem. A small residual trickle may be normal on some faucet designs, so check the manufacturer’s instructions before replacing the diverter.
Tools and Materials for Replacing a Kitchen Faucet Sprayer Hose
This job doesn’t require a full plumbing truck, but the right tools make it cleaner and faster. Get what you need together before you start, because hunting for a wrench with the water off is a good way to turn a simple repair into a mess.
Essential Tools for a Smooth DIY Job
I usually want an adjustable wrench, a flashlight, a towel, a bucket, and plumber’s tape. A basin wrench is handy when the connection sits deep under the sink. Pliers can help, but I don’t force them if the fitting is stuck.
A rag or small tray is useful too. Small clips, washers, and nuts disappear fast once they hit a cabinet floor.
How to Choose the Right Replacement Hose
The safest way to choose a replacement hose is to identify the faucet brand and model number, then match the manufacturer’s replacement part number. Faucet hoses may use threaded spray-head connections, quick-connect fittings, retaining clips, push-fit collets, or proprietary adapters that are not interchangeable.
Compare the new hose with the old one before installation. Check the overall length, spray-head connection, under-sink connector, hose diameter, O-ring position, retaining clip, and counterweight compatibility. Take clear photos before removing the original hose, especially if the model number is difficult to find.

Identifying Your Faucet Type and Connection Style
Before ordering a replacement hose, confirm whether you have a pull-down or pull-out faucet. Pull-down kitchen faucets usually feature a high-arc spout with a spray head that pulls downward into the sink, making them especially practical for rinsing deep basins and large cookware. Pull-out kitchen faucets typically have a more compact spray head that extends outward, which can work well with smaller sinks or low-clearance kitchen layouts.

Start by looking at the spray head and the under-sink connection. Some setups have a hose that connects to a spray head on top and a separate connection under the sink. Others use a more compact routed path with a counterweight.
Measure the hose length before you buy. Too short and it won’t retract properly. Too long and it can kink or snag inside the cabinet. I also check the thread size and the shape of the connector, because that’s where most mismatches happen.
If the cabinet is tight, I measure the actual route the hose takes, not just the straight-line distance. When the layout is awkward, our pull-out faucet collection gives a better sense of the routing options.
How to Replace a Kitchen Faucet Sprayer Hose Step by Step
This is the part most people picture when they think about replacing a kitchen faucet sprayer hose. It’s straightforward, but only if you stay organized and don’t rush the connections. According to This Old House, one of the first things to do before faucet repair is shut off the water supply valves under the sink. I follow that every time.
Shut Off the Water Supply
Turn off both shutoff valves under the sink. Then open the faucet so the remaining pressure drains out. I like to check for a quick drip at the spray head too, just to make sure the line is relaxed before I pull anything apart.
Turn off both the hot- and cold-water shutoff valves beneath the sink. Open the faucet and activate the spray function to release the remaining pressure. Place a bucket and towel under the hose connection.
If a shutoff valve is seized, leaking, or will not close without excessive force, stop and shut off the home’s main water supply or contact a plumber. Do not force an old valve, as the stem or supply connection may begin leaking.
Remove the Old Hose
Before disconnecting the hose, photograph its route and mark the counterweight position. Remove the counterweight or weight clip so it does not catch on the faucet body.
Disconnect the spray head by hand if it uses a threaded connection. Beneath the sink, release the hose according to its connector type: remove the retaining clip, press the release tabs, push the collet toward the fitting, or unthread the connector nut. Support the faucet outlet with one hand and pull the hose straight out without twisting the outlet tube.
Once both ends are disconnected, pull the old hose through the faucet spout in the same direction specified by the manufacturer.
Install the New Hose and Attach the Spray Head
Feed the new hose through the faucet body or guide the same way the old one came out. Then attach the spray head first if your faucet design makes that easier.
I usually hand-tighten every connection before I touch a wrench. That helps the threads start cleanly and keeps me from cross-threading anything. Once the fitting is snug, I give it a light extra turn.
If the hose has a threaded end, I use plumber’s tape where the connection calls for it. The goal is a seal that is firm, not crushed.
AWWA’s drip calculator on DrinkTap is a good reminder that tiny leaks add up fast. That’s why I check every joint before I call the job done.

Adjust the Counterweight and Perform a Leak Test
Reattach the counterweight at the original marked position or at the location specified by the faucet manufacturer. Pull the spray head out and allow it to retract several times. Make sure the hose does not rub against the drainpipe, supply lines, garbage disposal, or stored items.
Slowly reopen both shutoff valves. Run the faucet in each spray mode and inspect the spray-head connection and under-sink connector while the water is flowing. Turn the faucet off and check again for static drips. Place a dry paper towel beneath the fittings for several minutes, then recheck the cabinet later the same day.
Common Mistakes to Avoid When Replacing a Kitchen Faucet Sprayer Hose
Most hose replacements fail because of small mistakes, not because the job is complicated.
Overtightening Connections
This is the classic mistake. People think tighter means safer, but plumbing threads don’t work that way. If you crank a fitting down too hard, you can damage the washer, deform the seal, or make the next repair much harder.
Tightening requirements depend on the connector. Hand-tighten washer-sealed spray-head connections unless the manufacturer specifies an additional wrench turn. Quick-connect and collet fittings should be fully seated and locked rather than tightened with a wrench. If a connection leaks, check the washer, O-ring, alignment, and retaining clip before applying more force.
Using an Incompatible Replacement Hose
A hose can look close and still be wrong. Length, fitting type, and connection style all matter. I’ve seen people buy a universal part, only to discover the end fitting won’t match the faucet body.
That’s why I compare the old hose to the new one before install. When I spec parts for a project, I’m picky about fit. That’s one reason I like to work with [BRAND] on jobs where I want the connection path to stay clean and predictable.
Missing or Reusing Seals and Retaining Clips
A new hose may leak or disconnect if an O-ring, washer, connector collar, or retaining clip is missing or installed incorrectly. Use the new seals supplied with the replacement hose whenever possible, and do not assume the old clip or washer fits the new connector.
Skipping the Post-Installation Leak Test
If you skip the leak test, you’re gambling with the cabinet. A tiny drip can soak wood, stain the base, and create a bigger mess later.
Turn the water on, use the spray head, and watch the joints. Check again after a few minutes. Then check one more time after the cabinet has been closed and reopened.
How to Maintain Your Kitchen Faucet Sprayer Hose
A new hose shouldn’t be a short-term fix. With a little care, it can give you years of service.
Cleaning and Inspection Routines
Every so often, I open the cabinet and look for moisture, corrosion, or a hose that has shifted out of place. I also wipe down the spray head and check the hose path for sharp bends.
If the water in your area leaves mineral deposits, clean the spray head and fittings before buildup starts to affect flow. If the spray head starts crusting up, faucet head cleaning is usually the first thing I try.
Daily Habits That Extend Hose Life
Don’t yank the sprayer outward, and don’t let the hose slam back into place. Smooth motion is what keeps the internal lining and the fittings in good shape.
I also like to keep the cabinet clear around the hose path. Bottles, bins, and cleaning supplies can pinch the line and create the same kind of damage people blame on age.
If I’m setting up a kitchen from scratch or choosing a replacement faucet, I look for a hose layout that won’t fight the cabinet. A clean route and a good weight path make the whole install easier, and that’s where a well-chosen fixture from A-Torneira can help.