Installing a bathtub faucet is not only about attaching a new spout. You first need to identify whether your setup uses a slip-on or threaded tub spout, check the wall-mounted or deck-mounted connection, inspect the valve trim, seal the fitting correctly, and test for leaks before finishing the job.
In this A-Torneira guide, you’ll learn the tools needed, the key checks before installation, how to remove the old handle and spout, how to install the new bathtub faucet parts, and when the in-wall valve body should be handled by a professional plumber.
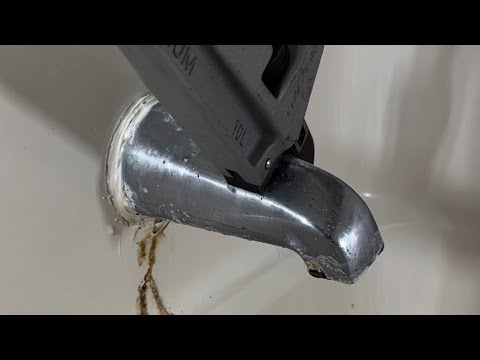
A dripping tub spout is more than an annoying sound at night. If water runs behind the wall or around the trim plate, it can lead to hidden moisture damage.
Quick note before we jump in: people say “bathtub faucet,” but most DIY jobs are really tub spout + trim replacement (the visible parts).
Replacing the in-wall valve body is a bigger project, and I’ll point out the few moments where you should pause and decide.
If you’re sourcing for a project while you read, start with a set that matches your install type.
You can browse my bathtub faucet collection and filter by finish and connection style so you don’t end up with the wrong parts.
Preparation: Essential Tools and Faucet Identification
Before you touch a screw, set yourself up to win.
The job feels “easy” only when you’re prepared.
Required Tools and Materials for Installation
Here’s what I lay out on an old towel beside the tub (so nothing rolls away):
- Adjustable wrench
- Hex keys (Allen keys)
- Phillips and flathead screwdrivers
- Plumber’s tape (PTFE tape)
- Silicone caulk (bathroom-grade)
- Utility knife
- Flashlight or headlamp
- Rag + small bucket

If you’re installing a new set, keep the manual nearby.
Even pros double-check parts.
Knowing Your Connection Type (Wall-Mounted vs. Deck-Mounted)

Most bathtub spouts are wall-mounted. You’ll see the spout coming straight out of the wall tile.
Deck-mounted faucets sit on the tub rim (more common in some hotels and older tubs).
If your spout comes out of the wall, this guide will fit you perfectly.
If it’s deck-mounted, the steps change a lot—access is usually from behind the tub.
Most homes I see are wall-mounted, and choosing the right style makes the whole job calmer.
If yours is wall-mounted, check the wall-mounted tub faucet category to find models designed for this exact setup.
Safety Checklist Before You Start
I do this quick safety check every time:
- Put a towel in the tub to protect the finish
- Cover the drain (small screws love to disappear!)
- Keep your phone out of the splash zone
- Know where the main water shutoff is
What Should You Check Before Installing a Bathtub Faucet?
| Check Item | Why It Matters | What to Do |
|---|---|---|
| Installation type | Wall-mounted and deck-mounted bathtub faucets require different installation access. | Confirm whether the faucet connects through the wall or tub deck before buying parts. |
| Spout connection | Slip-on and threaded spouts install differently. | Look for a set screw under the spout. If there is no set screw, it is usually threaded. |
| Pipe length | Incorrect pipe length can make the spout wobble, leak, or fail to sit flush. | Dry-fit the new spout before final tightening. |
| Valve trim compatibility | Trim kits do not fit every in-wall valve body. | Check the brand, model, and cartridge system before replacing trim. |
| Wall condition | Loose tile, damaged pipe, or hidden leakage can turn a simple job into a repair project. | Inspect around the escutcheon and stop if you see water damage. |
| Shutoff valve | A faulty shutoff makes installation unsafe. | Turn off the water and confirm pressure is released before removing parts. |
Step-by-Step Guide: How to Replace a Bathtub Faucet
This is the part most DIYers mess up—not because they’re “bad,” but because they rush.
Slow down. You’ll finish faster, I promise.
For a visual reference, you can also watch the installation video below after reading the key safety checks.
Step 1: Shut Off the Main Water Supply

Go to your main shutoff and turn it off fully.
Then open the tub faucet to release pressure.
I like to open a lower sink too, just for a second.
If water still runs strong after “shutoff,” stop—your main valve may not be working.
Step 2: Remove the Old Handle and Escutcheon
This is where I see the first panic moment: “Why won’t it come off?!”
If the handle won’t budge, don’t fight it with brute force.
I wrote a quick walkthrough on faucet handle removal that shows the common hidden screw spots and the safest way to pull it off without cracking the trim.
- Look for a tiny set screw (often under the handle).
- Use the right hex key and loosen it.
- Pull the handle straight off.
If it’s stuck, don’t yank like you’re starting a lawn mower.
Wiggle gently, and use a rag for grip.
Next, remove the escutcheon plate (that flat cover against the wall).
Behind it, you may see old caulk—slice it carefully with a utility knife.
Scene you’ll recognize: you’re kneeling on cold tile, flashlight in your mouth, staring at one stubborn screw that refuses to turn.
That’s normal. Breathe. A few drops of penetrating oil can help.
Step 3: Remove the Old Spout (Identifying Slip-On vs. Threaded Spouts)
This step is the whole game. First, identify the spout type:
A) Slip-on spout (set screw)
- Look underneath the spout near the wall for a small screw.
- Loosen it with a hex key.
- Pull the spout straight off the pipe.
If it won’t move, twist gently while pulling.
No violent moves—copper pipes can bend.
B) Threaded spout (screws off)
- No set screw underneath? It’s likely threaded.
- Grip the spout and turn it counterclockwise.
If it’s stuck, wrap the spout with a thick rag and use a wrench carefully.
Protect the finish so you don’t chew it up.
Slip-On vs. Threaded Tub Spout: Key Differences
| Spout Type | How to Identify It | Installation Note | Common Mistake |
|---|---|---|---|
| Slip-On Spout | Usually has a small set screw underneath the spout near the wall. | Slide the spout onto the pipe and tighten the set screw gently. | Using plumber’s tape, which can interfere with the internal O-ring seal. |
| Threaded Spout | Usually has no set screw and twists off counterclockwise. | Clean the male threads, wrap PTFE tape clockwise, and screw the spout on snugly. | Using too much tape or forcing the spout past the correct alignment. |
| Diverter Spout | Has a pull-up diverter that sends water to the shower head. | Make sure the diverter moves smoothly after installation. | Ignoring mineral buildup or poor diverter movement. |
| Non-Diverter Spout | Sends water only to the tub outlet. | Choose this only when no shower diverter is needed at the spout. | Buying the wrong style for a tub/shower setup. |
Step 4: Install the New Tub Spout, Trim, or Faucet Components
This step depends on what you’re replacing.
If You’re Replacing Only the Tub Spout
Slip-on install
- Slide the new spout onto the pipe until it sits flush.
- Tighten the set screw snug (not “gorilla tight”).
Important: do not use plumber’s tape on a slip-on spout.
Slip-on designs typically seal with an internal O-ring, and tape can keep it from sealing right.
Threaded install
- Clean the threads on the pipe (old tape, old gunk—remove it).
- Wrap plumber’s tape on the male threads in a clockwise direction (the same direction you’ll turn the spout).
Source: Swagelok — PTFE Thread Sealant Tape Card (MS-14-01) - Screw on the new spout clockwise until it’s snug and pointing straight down.

Quick DIY reality check (this one saves headaches): look at the pipe nipple length.
If it’s too long, the spout may bottom out and never touch the wall. If it’s too short, it may wobble or leak.
That mismatch is one of the most common “Wait… why doesn’t it fit?” moments.
And here’s a weird one that happens more than people admit: the spout feels tight… but it points slightly up.
If it’s slightly off, sometimes an extra half-turn or adjusting the amount of tape is the secret.
If that’s you, check this fix guide on tub spout alignment problems—it covers thread timing, nipple length, and when to stop tightening.
I still do a quick “dry fit” first.
I want to see how it lines up before I commit with tape and final tightening.
If You’re Replacing the Valve/Trim (Deeper Job)
If the valve is inside the wall, the job may require opening an access panel.
At that point, I follow the manufacturer steps exactly, because cartridge and trim systems vary.
A simple rule:
If you must solder inside the wall and you’ve never soldered before, this is a smart place to call a plumber.
Step 5: Test for Leaks and Secure the Trim
Turn the water back on slowly.
Then test in this order:
- Run tub water for 60 seconds
- Stop water and watch the spout
- Check behind the escutcheon (shine a light)
- Try the diverter (if you have one)
Even small leaks matter. The EPA says average household leaks can waste nearly 10,000 gallons a year, and dripping faucets are on the usual suspect list.
Source: US EPA WaterSense — Fix a Leak Week
If everything is dry, re-caulk neatly around the escutcheon and spout (a thin bead).
Let the silicone cure based on the label before heavy use.
Second scene, very real: it’s Saturday morning, sunlight hits the tub, and you’re watching the spout like it’s a suspense movie.
No drips. Quiet bathroom. That feeling? That’s DIY victory.
Professional Tips for a Clean Bathtub Faucet Installation
Thinking bigger upgrades for a remodel? Some people use this DIY moment to change the whole vibe.
If you’re doing a bathroom refresh, take a look at freestanding tub faucets for that clean, modern look you see in hotels.
The Right Way to Apply Plumber’s Tape (Avoiding Common Threading Errors)
Tape should follow the direction you tighten the fitting.
Wrap it smoothly so it doesn’t bunch up.
And keep it neat—don’t let tape hang into the opening where water flows.
How to Achieve a Watertight Seal with Silicone
Less silicone looks better and lasts longer.
If you lay a giant bead, it will peel and catch dirt.
I cut the nozzle small, go slow, and smooth it with a wet finger.
Clean edges make it look “pro,” even if you’re not.
Flushing the Lines to Prevent Future Clogs
After install, run hot and cold for a minute.
This helps clear tiny bits of tape, mineral flakes, or debris.
Troubleshooting Common Installation Hurdles
Solving Low Water Pressure Issues After Installation
If pressure drops right after replacement, check:
- Aerator or screen (some spouts have one)
- Debris stuck in the valve or cartridge
- A partially closed shutoff valve
Sometimes the fix is just flushing longer.
What to Do If the Diverter Is Stuck or Noisy
A diverter that squeals or sticks often has mineral buildup.
Try cycling it up/down while water runs to clear grit.
If it stays noisy, the diverter inside the spout may need replacement.
Handling Rusted or Corrosion-Damaged Pipes
If the pipe looks cracked, heavily rusted, or misshapen, stop.
Forcing a new spout onto bad pipe can create a hidden leak in the wall.
This is one of those moments where a plumber saves money, not costs it.
Common Bathtub Faucet Installation Problems and Fixes
| Problem After Installation | Possible Cause | Suggested Fix |
|---|---|---|
| Spout does not sit flush against the wall | Pipe nipple may be too long, or old sealant may block the spout. | Clean the wall area and check whether the pipe length matches the new spout. |
| Spout wobbles after installation | Pipe may be too short, or the set screw is not tightened correctly. | Recheck the connection type and tighten the set screw gently if it is a slip-on spout. |
| Water leaks behind the trim plate | Escutcheon may not be sealed, or the valve body may have hidden leakage. | Remove the trim, inspect with a flashlight, and call a plumber if water appears inside the wall. |
| Water still drips after shutoff | This is usually a valve cartridge or seal issue, not the tub spout itself. | Inspect the cartridge or valve seal before replacing more visible parts. |
| Low water pressure after installation | Debris, tape fragments, or mineral buildup may block the outlet or valve. | Flush the lines and check the screen, aerator, diverter, or cartridge. |
| Diverter is stuck or noisy | Mineral buildup or internal diverter wear may be restricting movement. | Cycle the diverter with water running, clean buildup, or replace the spout if needed. |
FAQs: Common Questions About Bathtub Faucet Replacement
Q: When to Call a Professional Plumber
A: Call a pro if you see water inside the wall, need soldering, or the shutoff doesn’t fully stop water.
Also call if the pipe is damaged or the valve body is leaking.
Q: What to Recheck After 24 Hours (Inspecting for Slow Leaks or Settling)
A: Run water again and check under the spout and behind the trim with a flashlight.
Slow leaks can show up after parts “settle” overnight.
Q: How to Maintain a Bathtub Faucet to Prevent Leaks and Wear
A: Wipe it dry after heavy use and clean gently (no harsh powders).
If you have hard water, remove mineral buildup early before it locks parts in place.
Q: Why Is My Tub Faucet Dripping? (Understanding the Difference Between Valve Issues and Residual Water)
A: A short drip after shutoff can be leftover water draining from the pipe.
A drip that keeps going usually points to a worn cartridge or valve seal.
If the drip keeps coming back, it’s usually a cartridge or valve seal issue, not the spout.
I have a simple guide on how to repair a leaky tub faucet with the common causes and the quick checks I do before swapping parts.
Q: How Long Does It Take to Replace a Bathtub Faucet?
A: If it’s just the spout, I often finish in 30–60 minutes.
If you’re replacing valve trim too, plan for longer—especially if access is tight.