Before you start reading, I came across this YouTube video—hope it helps!
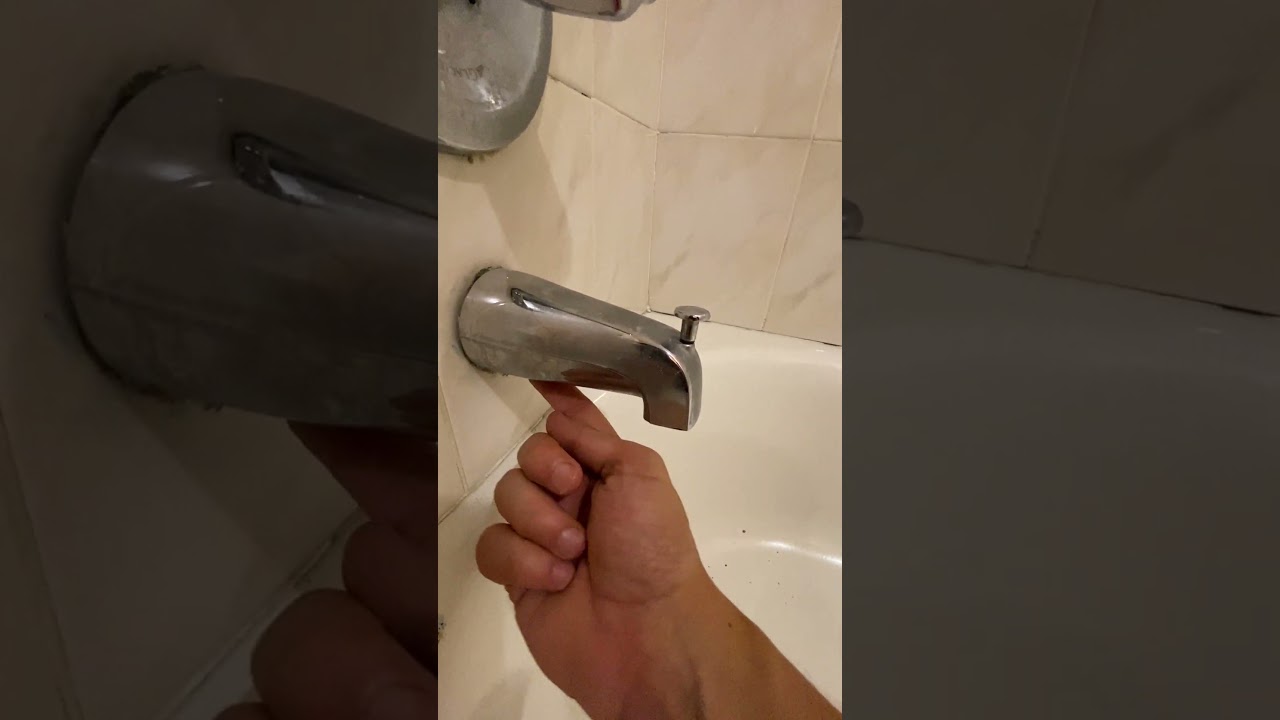
Preparation: Essential Tools and Identifying Your Faucet Type
Before I touch anything, I lay out tools and take one minute to “read” the hardware. That small habit (I call it my A-TORNEIRA pause) saves me from scratched finishes, bent pipes, and surprise leaks.
Essential Tools You’ll Need

Here’s what I actually use most of the time:
- Allen keys (hex keys)
- Pipe wrench (or adjustable wrench)
- Screwdrivers (flat + Phillips)
- Old towel or soft rag (to protect finishes)
- Flashlight
- Small bucket + extra towels
If I’m dealing with a stuck handle, I also keep penetrating oil and a simple handle puller nearby.
The Expert’s “Don’t List”: What to Avoid Using
These are the “tempting” tools that often cause damage:
- Bare pliers on shiny chrome (they can scratch the plated surface)
- Hammering directly on the spout (easy way to bend the pipe)
- Overheating parts with an open flame (risky near walls and seals)
- Forcing a handle that won’t move (you can crack trim or damage the valve)
My rule: if I feel myself getting impatient, I stop and switch tactics.
Identify Your Tub Spout Connection Type: Slip-On vs. Threaded
This one decision changes everything.
A slip-on spout slides over a smooth copper pipe and is held by a hidden set screw.
A threaded spout twists onto pipe threads coming out of the wall (often steel or brass fittings).
The quick test I use: I look underneath the spout near the wall. If I see a small hole, it’s often slip-on with a set screw. If there’s no hole, it’s often threaded (but not always).
If you’re not 100% sure what you’re looking at, I don’t blame you—many faucets hide their connection details. When I feel unsure, I step back and review the basics of how parts fit together. It saves time and prevents mistakes.
Understanding Faucet Structure: A Practical Guide
Diverter vs. Non-Diverter: What Changes During Removal and Replacement
A diverter spout has the little pull-up knob that sends water to the shower.
While removal follows the same steps, compatibility is key for replacement.
The diverter spout must match the right internal design and length.
That helps it switch cleanly.
It also helps prevent dribbling.
One-Hole vs. Three-Hole: What You’re Actually Removing
People say “faucet” but mean different things.
- If you’re removing the tub spout, that’s the outlet down low.
- If you’re removing handles and valve parts, that’s up on the wall (or deck).
On a three-hole setup, you might have hot + cold handles plus a separate spout (common on decks). On many tubs, the spout is separate from the handle valve(s) even if it looks like one system.
Safety First: How to Properly Shut Off the Water Supply
I shut off water before I touch handles or cartridges.
Best case: there are local shutoff valves near the tub access panel. If not, I shut off the main water to the home.
Then I open the tub faucet to relieve pressure and confirm the water is really off. I also keep a towel in the tub because a little trapped water always sneaks out.
Step-by-Step Guide: Removing the Tub Spout
If I’m removing a tub spout, I usually already have the replacement ready. That way, I can swap parts in one go and avoid leaving the tub unusable. If you’re shopping for a match, start here: Bathtub faucet
This is the main part of the job. The spout looks simple, but the connection type controls everything. When I go slow and protect the finish, I usually avoid damage.
Before You Start: Two Quick Checks I Always Do
I do these every time, even if I’m “sure.”
First, I look at the wall edge where the spout meets the tile. If there’s heavy caulk, I slice it gently with a utility knife. That way, the spout can move without tearing paint or grout.
Second, I protect the finish. I wrap the spout with a towel before any wrench touches it. Scratches happen fast.
Removing a Slip-On Spout (Locate and loosen the hidden set screw)
- I crouch and look underneath the spout near the wall.
- I find the tiny set-screw hole (sometimes it’s filled with gunk).
- I clear the hole with a toothpick or small pick if needed.
- I insert the right Allen key and turn counterclockwise to loosen.
- Once it’s loose, I pull the spout straight off the pipe.
If it doesn’t slide off, I don’t twist hard. I wiggle gently side-to-side while pulling straight. Twisting like I’m opening a jar can bend the copper stub-out pipe.
A small detail I always watch: some set screws are soft metal. If I use the wrong Allen key size, it can strip. When it feels “slippery,” I stop and re-check the fit.
Removing a Threaded Spout (Use leverage without deforming the pipe)
Threaded spouts usually come off by turning the entire spout counterclockwise.
Here’s how I do it without wrecking anything:
- I cut any caulk at the wall edge.
- I hold the spout close to the wall (less wobble).
- I turn counterclockwise with steady pressure.
If it’s stuck, I try these steps in order:
- Vinegar soak: I fill a plastic bag with white vinegar and tie it around the spout base for a few hours. This helps dissolve mineral buildup.

- Hair dryer: I warm the spout base with a hair dryer for a few minutes. I keep it moderate, not blazing hot.
Avoid applying downward leverage while turning, as this puts unnecessary stress on the interior plumbing. I aim for a level, controlled twist.
How I Tell “Stuck” from “Not Moving Because It’s the Other Type”
This saves me from a common mistake.
- If I’m turning the spout, and it rotates a little, then stops with a gritty feeling, it’s often threaded.
Old tape or mineral buildup is usually the reason. - If nothing moves at all, and I notice a hidden hole underneath, it’s probably slip-on and I missed the set screw.
This is where I pause, shine a flashlight, and confirm. That one extra minute is very A-TORNEIRA.
Expert Fix: How to Remove a Spout Without a Visible Set Screw
Sometimes the set screw is hidden by caulk, mineral buildup, or a tiny cover.
What I do:
- I run my finger under the spout and feel for a hole filled with crust.
- I clean the area and look again with a flashlight.
- I gently scrape around the underside seam—some spouts hide the hole well.
If I still can’t find a hole, I treat it like a threaded spout and try a gentle counterclockwise turn.
If it turns but won’t release, I keep turning slowly until it unthreads. If it “springs back,” I stop.
What I Do If the Pipe Starts to Move
If the pipe behind the wall moves, I stop.
It can mean the fitting inside isn’t supported.
I check for an access panel.
If I can’t check the support, I don’t force it.
When a pipe feels loose behind the wall, I think about support and long-term stability—not just “getting it done today.” If you’re planning a cleaner, more secure setup, it may be worth looking at a design made for that style of install: Wall mount tub faucet
Diverter Spout Note: One Small Test I Always Do
After removal (and before reinstall), I look inside the old diverter spout.
If it’s packed with mineral buildup or corrosion, I treat it as a warning.
Brass corrosion can leach heavy metals early on.
It can also compromise structural integrity over time.
How to Remove Bathtub Faucet Handles and Cartridges
When the real problem is dripping, stiff turning, or temperature issues, the handle and cartridge are usually the target.
That’s where I focus.
Removing Decorative Caps and Handle Screws
Most handles hide the screw under a little cap.
I pop the cap carefully with a small flat screwdriver. I go slow so I don’t gouge the trim. Then I remove the screw and pull the handle off.

Dealing with Stuck or Corroded Handles (Using penetrating oils or handle pullers)
If the handle won’t come off, I don’t fight it right away.
- I add penetrating oil where the handle meets the stem.
- I wait, then wiggle and pull.
- If it’s still stuck, I use a handle puller.
Extracting the Cartridge: Retaining Clip vs. Bonnet Nut
Inside, you’ll usually see one of two systems:
- A retaining clip: a small metal clip holds the cartridge in place. I pull it straight out with pliers.
- A bonnet nut: a larger ring/nut threads over the cartridge. I loosen it with the right wrench.
Then I pull the cartridge straight out. If it’s stuck, I use a cartridge puller made for that valve type.

After Removal: Inspect and Reinstall Without Leaks
I keep this part simple. My goal is leak-free, not “perfect.”
Check the Stub-Out and Connection for Wear
I check the pipe coming out of the wall.
Is it bent? Are threads damaged? Is the length correct? If something looks wrong, I fix that first.

Choose a Compatible Replacement Spout (Matching length and diameter)
I match the connection type first (slip-on vs. threaded). Then I match size and length so the spout sits flush to the wall.
Sometimes I realize the old setup is worth upgrading, especially if the bathroom is being refreshed anyway. If you want a more modern look and easier access around the tub area, I’d compare your current layout with a floor-standing option: Freestanding tub faucet
Reinstall the Right Way: Sealants and Torque
For threaded spouts, I remove old tape and wipe threads clean. Then I apply fresh plumber’s tape.
For slip-on spouts, I slide it on fully and tighten the set screw until secure—firm, not extreme.
One small detail I watch for is alignment. Sometimes the spout feels tight, but it still points slightly up or off-center. When that happens, I follow a simple adjustment routine instead of forcing it.
Faucet Tightened but the Spout Points Up?
Final Checks: Testing for Leaks and Diverter Function
I turn water back on slowly and test for drips at the wall and under the spout.
For diverters, I pull up and push down a few times to confirm it switches cleanly.

Troubleshooting and Professional Maintenance Tips
What to Do If the Pipe Behind the Wall is Loose or Damaged
If the pipe moves when I touch the spout, I stop.
It may be a loose fitting or weak support.
If I keep going, I could crack a joint or cause a hidden leak.
If there’s an access panel, I open it.
If not, I call a plumber.
Cleaning the Pipe Threads and Applying New Plumber’s Tape
I always clean threads first. Old tape + mineral buildup = crooked spout + slow leaks.
I wipe first. I brush gently if needed. Then I wrap tape in the same direction the spout tightens.
Maintenance Secrets to Prevent Future Corrosion and Seizing
These habits help:
- Wipe the spout dry sometimes
- Don’t crank the diverter knob too hard
- Clean mineral buildup early, especially with hard water

If I keep seeing white crust, green stains, or a handle that’s getting harder to turn every month, I treat it as a corrosion problem—not just “old hardware.” Knowing what triggers corrosion makes prevention much easier.
What Causes Bathroom Faucets to Corrode?
If old parts seize up, corrosion is often why.
One review explains dezincification and how zinc can leach from brass.
That process can weaken parts over time.
Corrosion can also fail suddenly.
One case study linked a brass fitting failure to stress corrosion cracking.
When I stay calm, the job goes smoother.
Identify the spout type first.
Protect the finish.
Use steady force.
Reinstall with clean connections.
That A-TORNEIRA mindset keeps it controlled.